环境要求
域名(托管到cloudflare)、服务器(安装好1Panel面板)
解析域名、cloudflare相关配置、获取域名证书
域名解析
解析一条二级域名到服务器并开启小黄云(开启代理状态),例如将nezha.spacex.com解析到服务器
cloudflare相关配置
在cloudflare的SSL/TLS选项中将配置加密模式改为完全(严格)
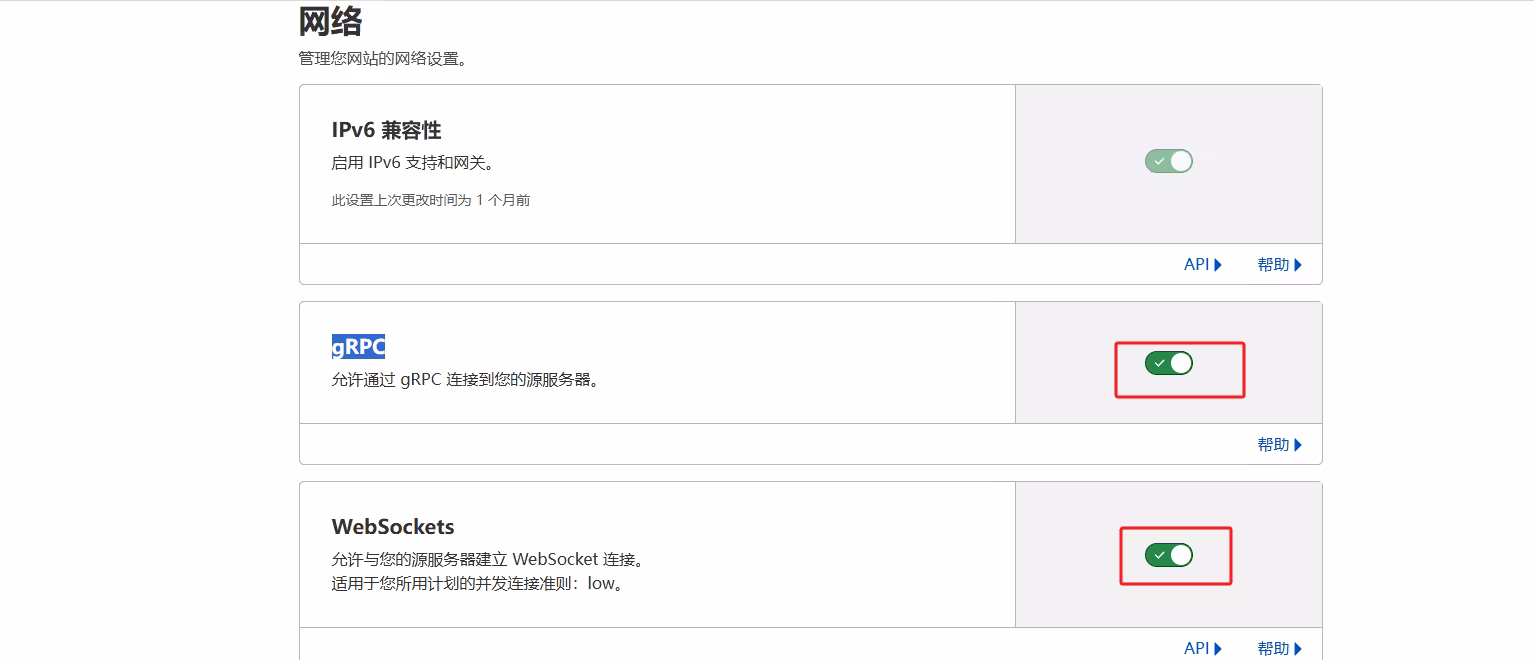
在cloudflare的网络选项中开启gRPC和WebSocks
获取域名证书
在cloudflare的SSL/TLS选项中,选择源服务器,点击创建证书如下图所示
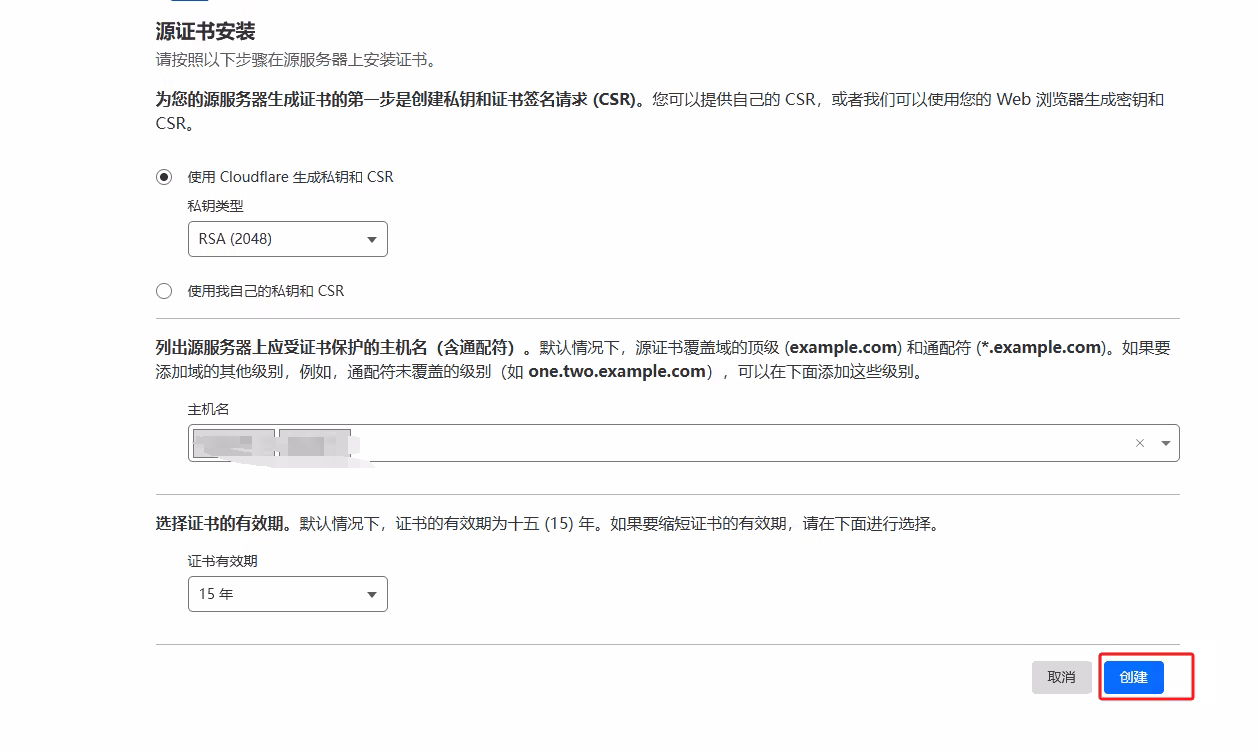
点击创建,生成15年域名证书,将下图中的源证书和私钥保存下来

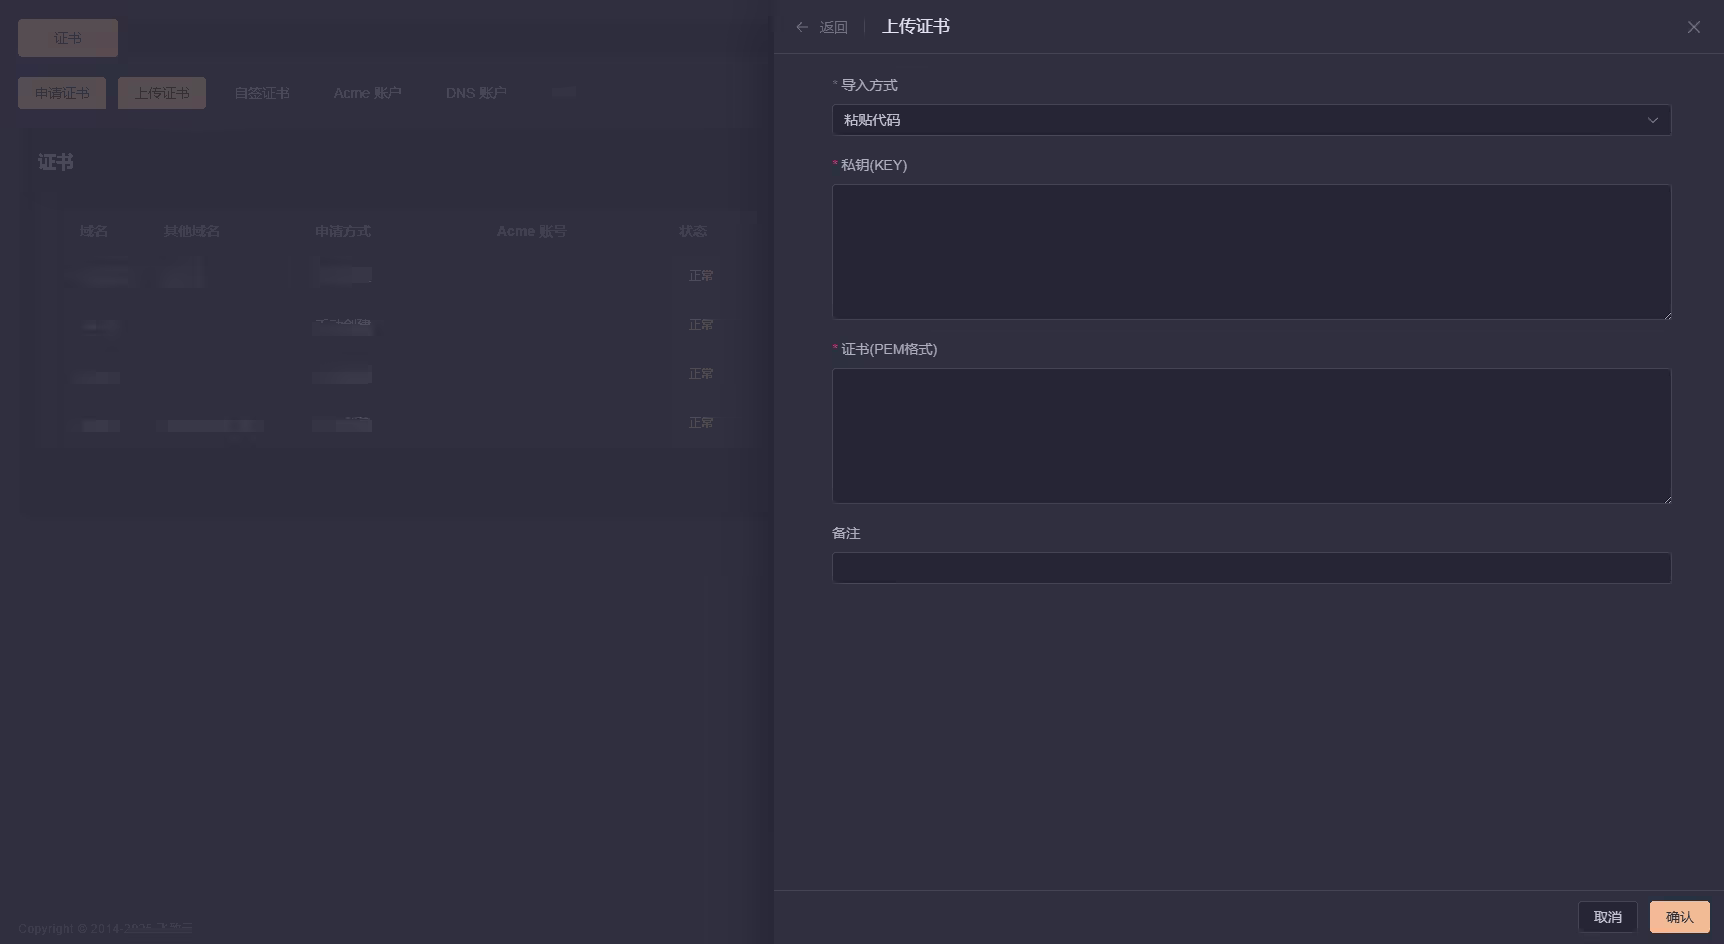
打开1panel面板里的网站--证书栏目,选择上传证书,将保存下的源证书和私钥复制进来,并点击确认。
安装脚本
在面板服务器中,运行安装脚本:
curl -L https://raw.githubusercontent.com/nezhahq/scripts/refs/heads/main/install.sh -o nezha.sh && chmod +x nezha.sh && sudo ./nezha.sh中国大陆,可以使用镜像:
curl -L https://gitee.com/naibahq/scripts/raw/main/install.sh -o nezha.sh && chmod +x nezha.sh && sudo CN=true ./nezha.sh运行脚本后有两种安装方式,个人比较喜欢用docker安装方式。
选择安装方式后,输入数字1,按回车后安装面板端,会提示输入一下信息,可根据自己情况填写。
-
站点标题 - 自定义站点标题
-
暴露端口 - 默认为8008,建议更改为高位端口
-
nezha-agent连接地址 - 域名加443,例如nezha.spacex.com:443
-
是否希望通过 TLS 连接 Agent - 输入y
-
请指定后台语言 - 选择语言偏好
开启反向代理
开启SSL
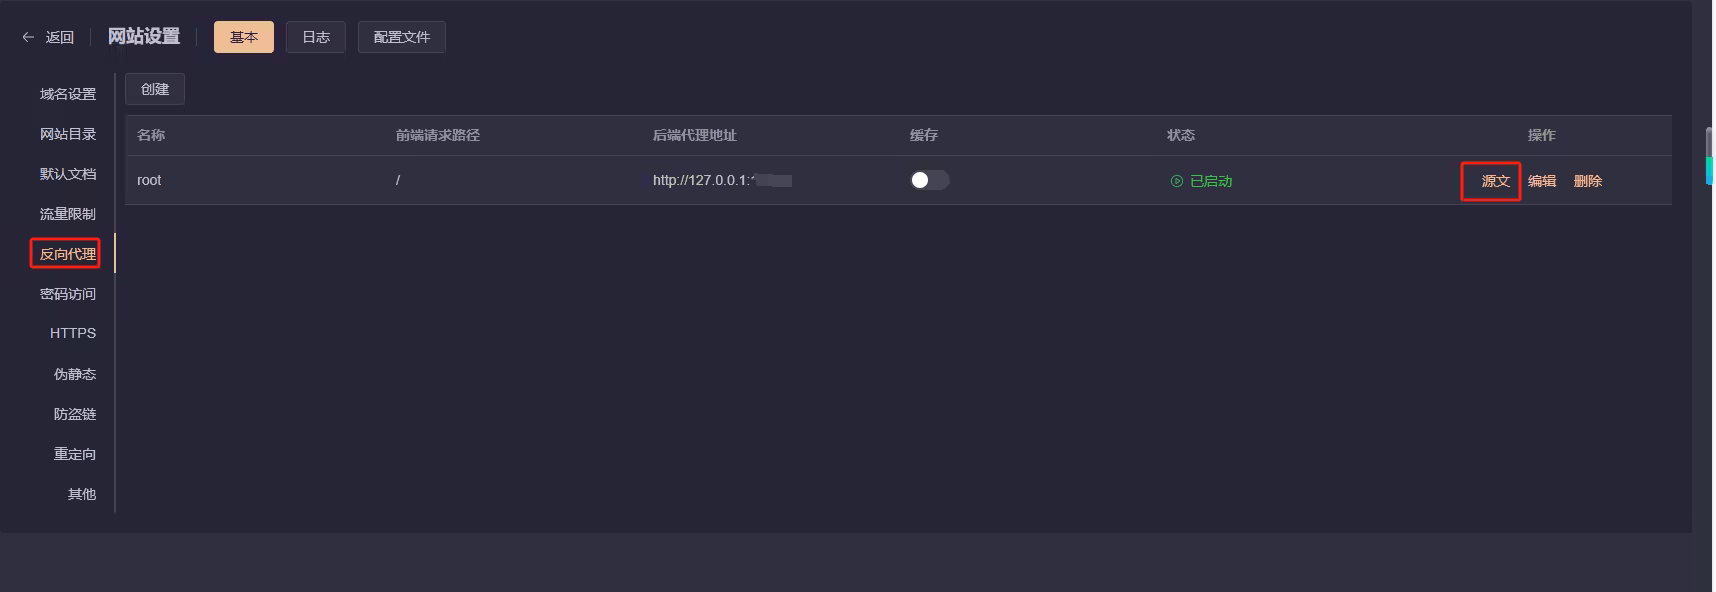
在1panel面板中选择网站选项,点击创建,选择反向代理。
-
主域名 - 填写解析的域名,例如nezha.spacex.com
-
代理地址 - 填写127.0.0.1:8008(8008端口为上面配置的暴露端口,按实际情况填写)
-
其他选项 - 默认
点击配置选项,选择https,开启https,证书选择为之前上传的证书,并点击保存。
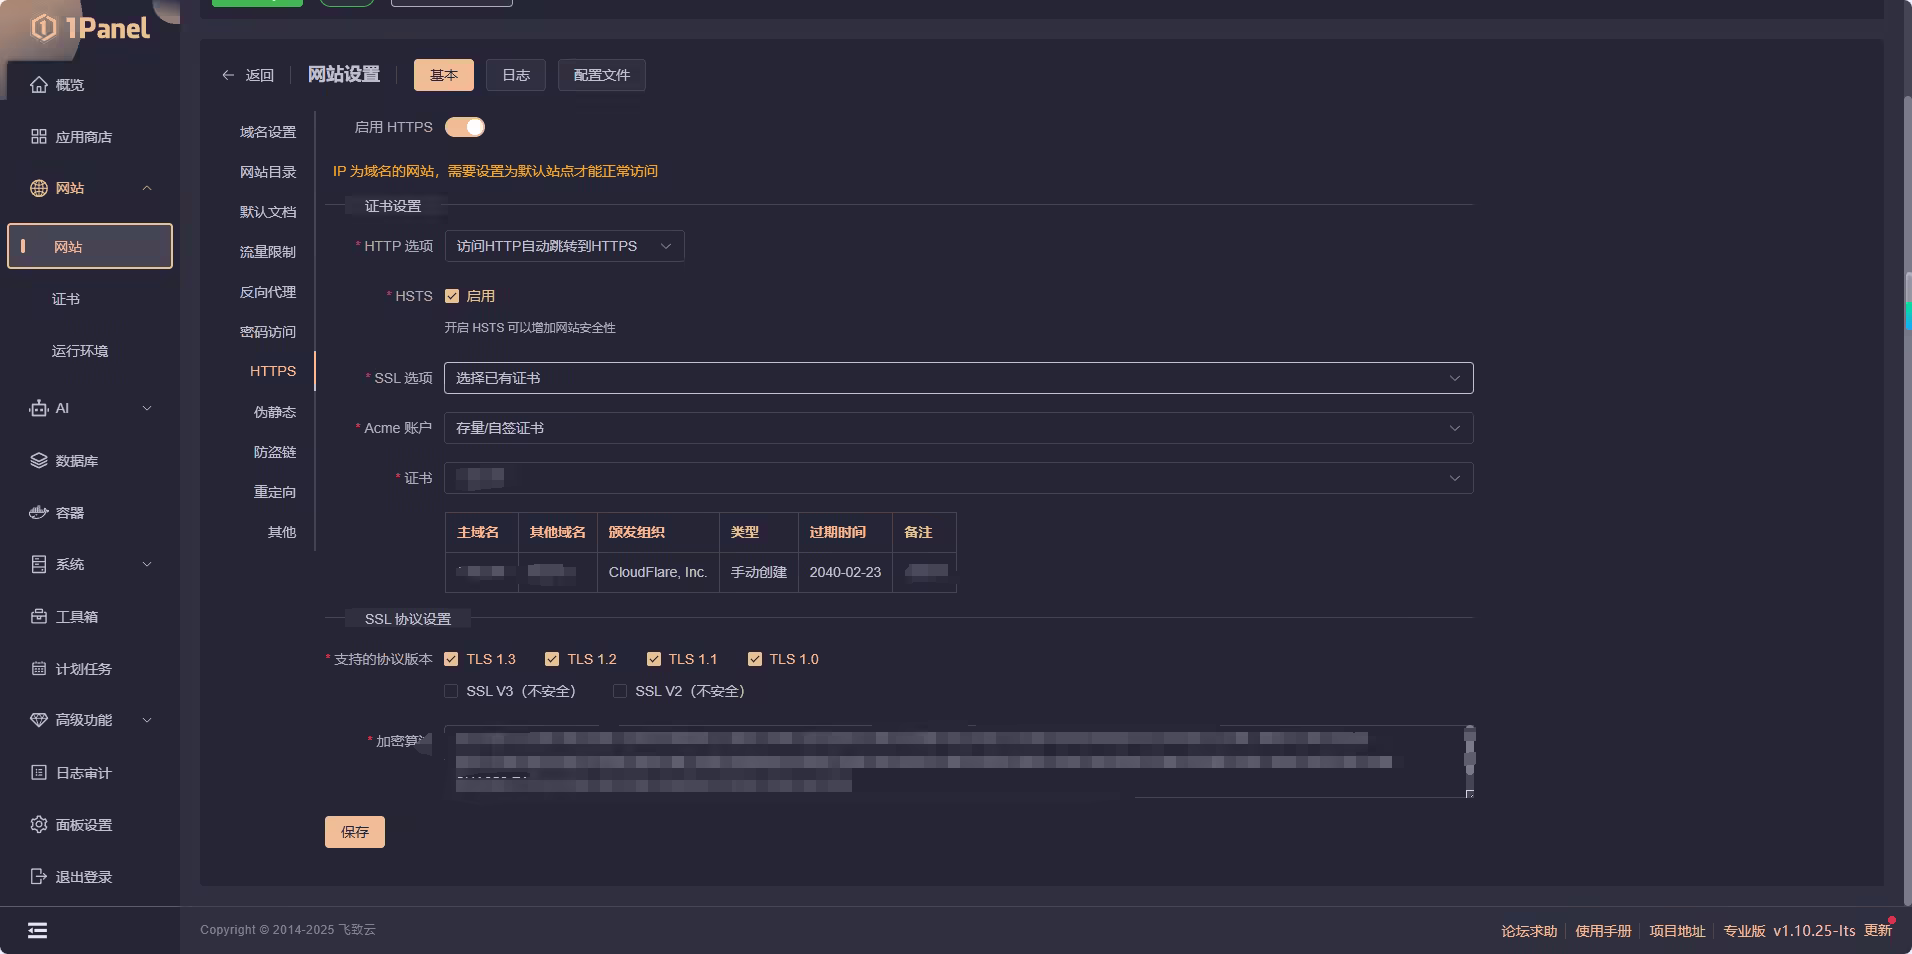
配置成功后就可以访问面板网址,如访问不成功,请检查以上配置。
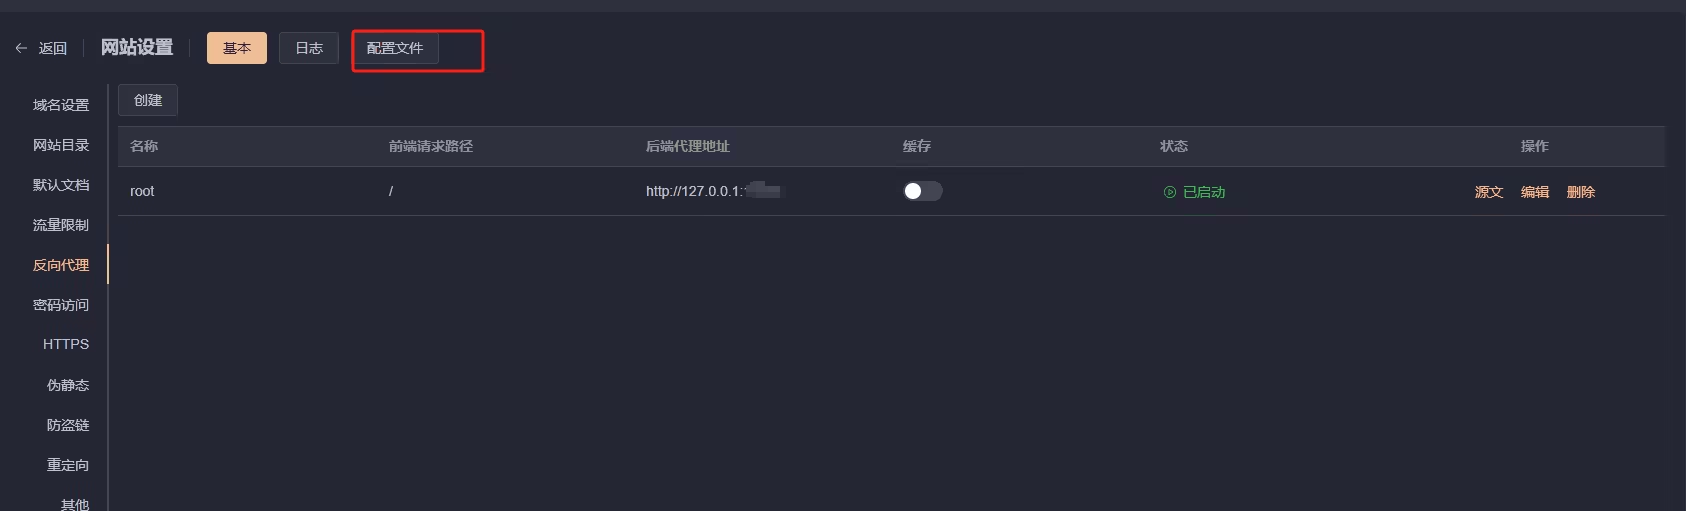
设置配置文件
在刚才的反向代理页面,点击配置文件,在配置文件后面添加如下配置内容(其中8008端口更改为你之前设置的端口),点击保存并重载。
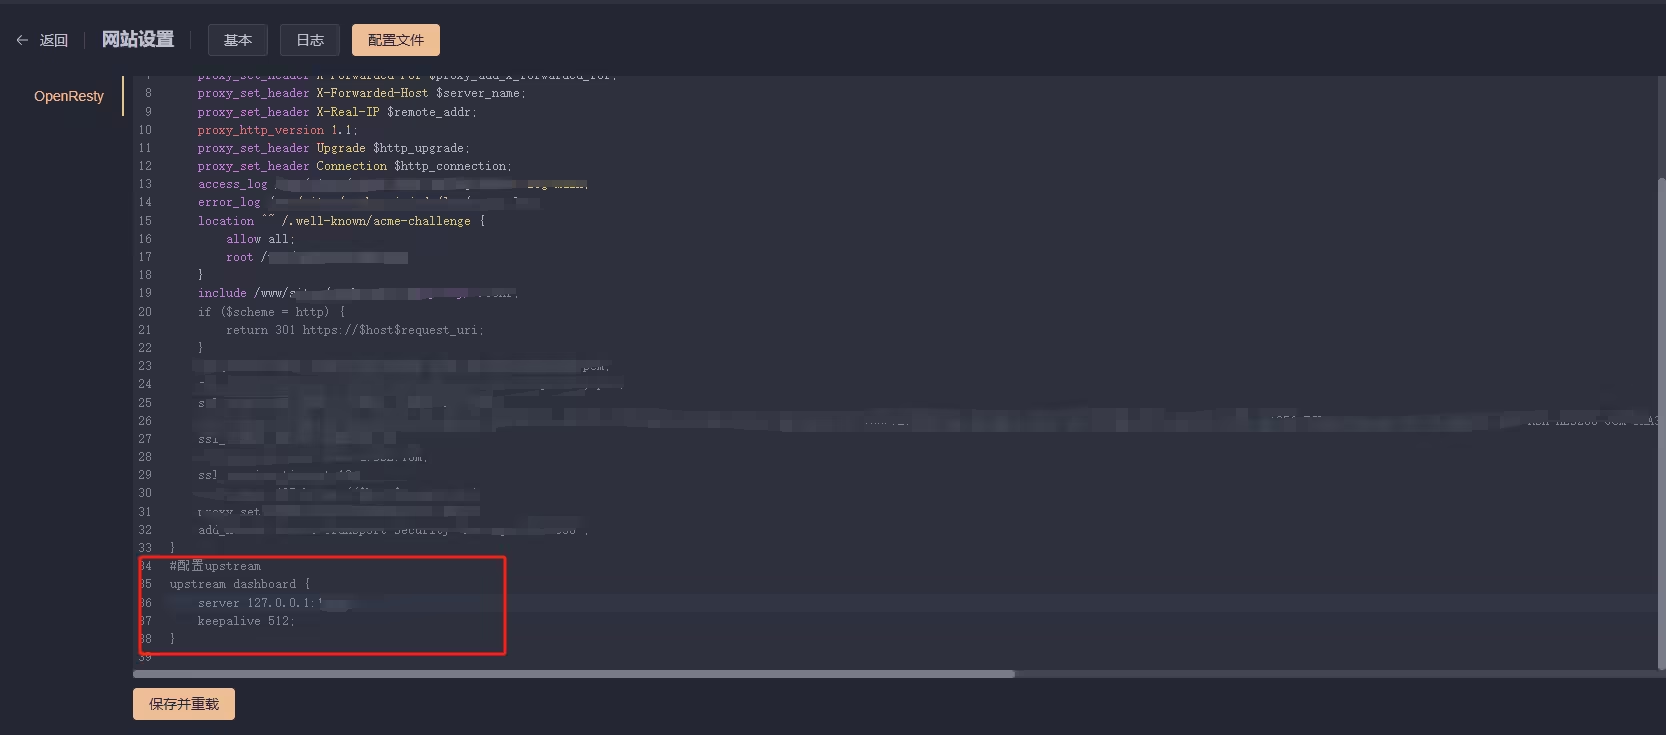
#配置upstream
upstream dashboard {
    server 127.0.0.1:8008;
    keepalive 512;
}打开网站--反向代理--源文,将里面的内容全部替换成以下内容(开头第二行8008端口和倒数第二行端口8008,更改为你之前设置的端口)
location ^~ / {
    proxy_pass http://127.0.0.1:8008;
    proxy_set_header Host $host;
    proxy_set_header X-Real-IP $remote_addr;
    proxy_set_header X-Forwarded-For $proxy_add_x_forwarded_for;
    proxy_set_header REMOTE-HOST $remote_addr;
    proxy_set_header Upgrade $http_upgrade;
    proxy_http_version 1.1;
    #proxy_set_header Connection $http_connection;
    #proxy_set_header X-Forwarded-Proto $scheme;
    #insert begin
    proxy_set_header nz-realip $http_cf_connecting_ip;# 替换为你的 CDN 提供的私有 header,此处为 CloudFlare 默认
    # grpc_set_header nz-realip $remote_addr; # 如果你使用nginx作为最外层,就把上面一行注释掉,启用此行
    proxy_set_header Connection "upgrade";
    proxy_read_timeout 3600s;
    proxy_send_timeout 3600s;
    proxy_buffer_size 128k;
    proxy_buffers 4 256k;
    proxy_busy_buffers_size 256k;
    proxy_max_temp_file_size 0;
    proxy_set_header X-Forwarded-Proto $scheme; # 如果你使用nginx作为最外层,就启用此行避免无法正确读取访问的协议
    #insert end
    add_header X-Cache $upstream_cache_status;
    add_header Cache-Control no-cache;
    proxy_ssl_server_name off;
    proxy_ssl_name $proxy_host;
    add_header Strict-Transport-Security "max-age=31536000";
}

underscores_in_headers on;
set_real_ip_from 0.0.0.0/0;# 替换为你的 CDN 回源 IP 地址段
real_ip_header CF-Connecting-IP;# 替换为你的 CDN 提供的私有 header,此处为 CloudFlare 默认
# 如果你使用nginx作为最外层,把上面两行注释掉


# grpc 相关
location ^~ /proto.NezhaService/ {
    grpc_set_header Host $host;
    grpc_set_header nz-realip $http_CF_Connecting_IP; # 替换为你的 CDN 提供的私有 header,此处为 CloudFlare 默认
    # grpc_set_header nz-realip $remote_addr; # 如果你使用nginx作为最外层,就把上面一行注释掉,启用此行
    grpc_read_timeout 600s;
    grpc_send_timeout 600s;
    grpc_socket_keepalive on;
    client_max_body_size 10m;
    grpc_buffer_size 4m;
    grpc_pass grpc://dashboard;
}

# websocket 相关
location ~* ^/api/v1/ws/(server|terminal|file)(.*)$ {
    proxy_set_header Host $host;
    proxy_set_header nz-realip $http_cf_connecting_ip;  # 替换为你的 CDN 提供的私有 header,此处为 CloudFlare 默认
    # proxy_set_header nz-realip $remote_addr; # 如果你使用nginx作为最外层,就把上面一行注释掉,启用此行
    proxy_set_header Origin https://$host;
    proxy_set_header Upgrade $http_upgrade;
    proxy_set_header Connection "upgrade";
    proxy_read_timeout 3600s;
    proxy_send_timeout 3600s;
    proxy_pass http://127.0.0.1:8008;
}
以上相关配置参考来源:Dashboard 反向代理配置 | 哪吒服务器监控
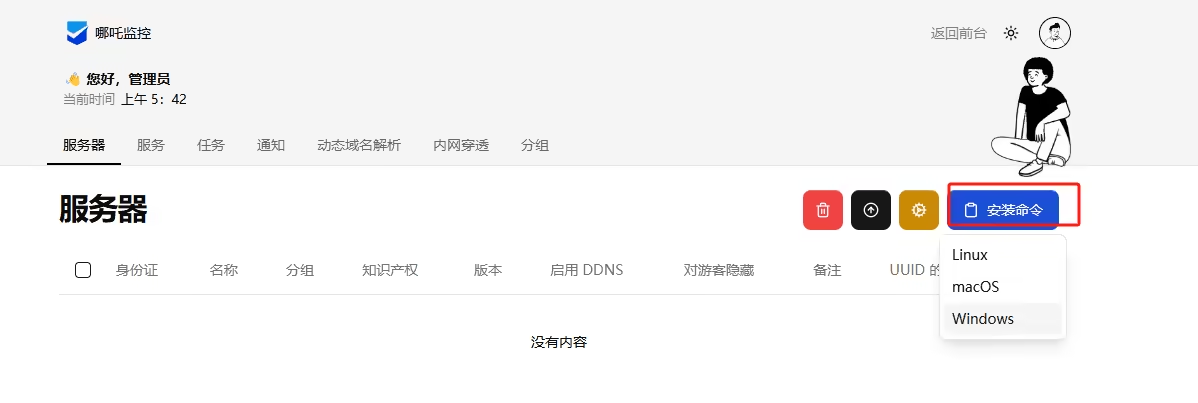
添加控制
以上内容配置完成后,打开你的解析域名,例如nezha.spacex.com登录到哪吒面板,默认账号和密码都为admin,记得更改登录信息。
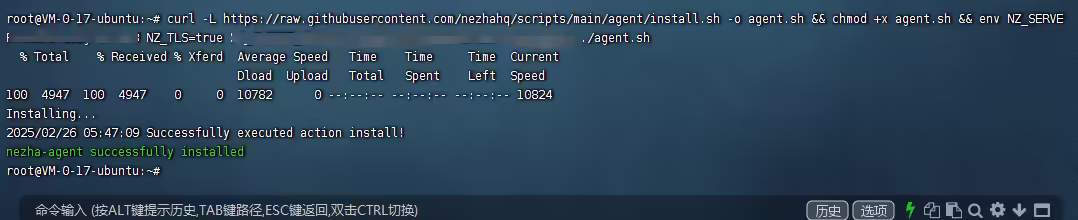
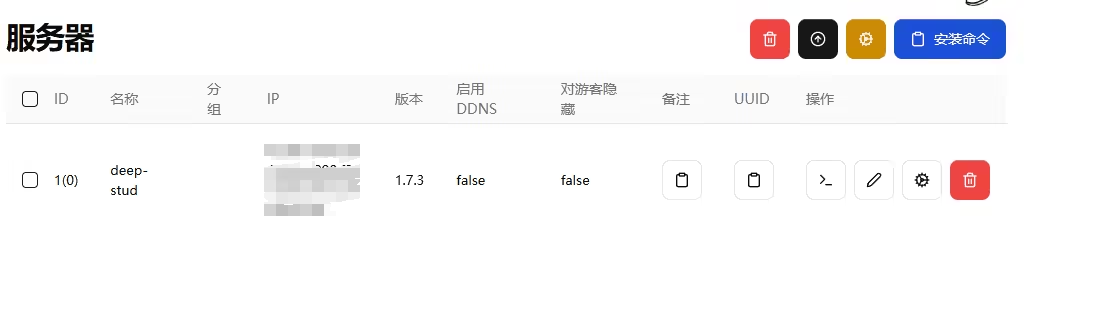
登录账号进入到后台管理页面,点击安装命令,选择对应被控系统,将命令复制到被控服务器中运行即可。